
 Pin it
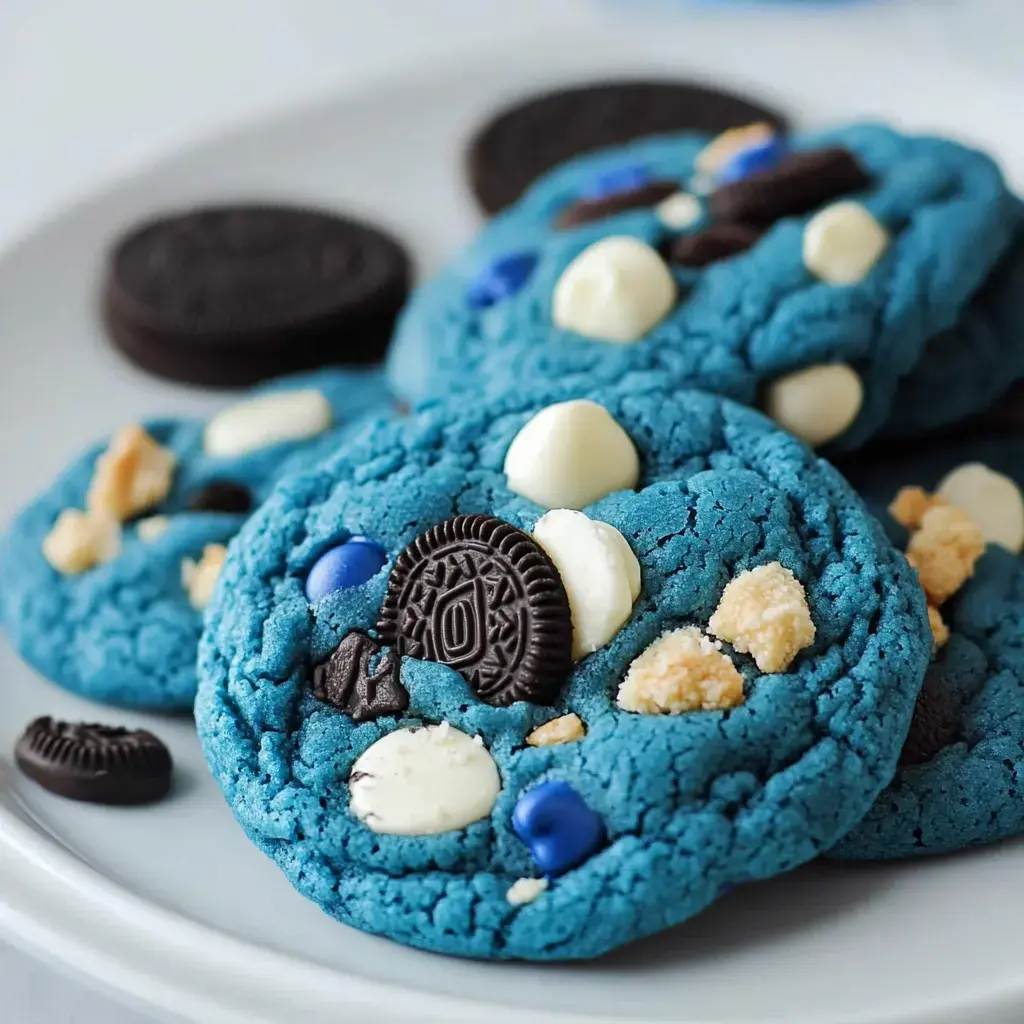
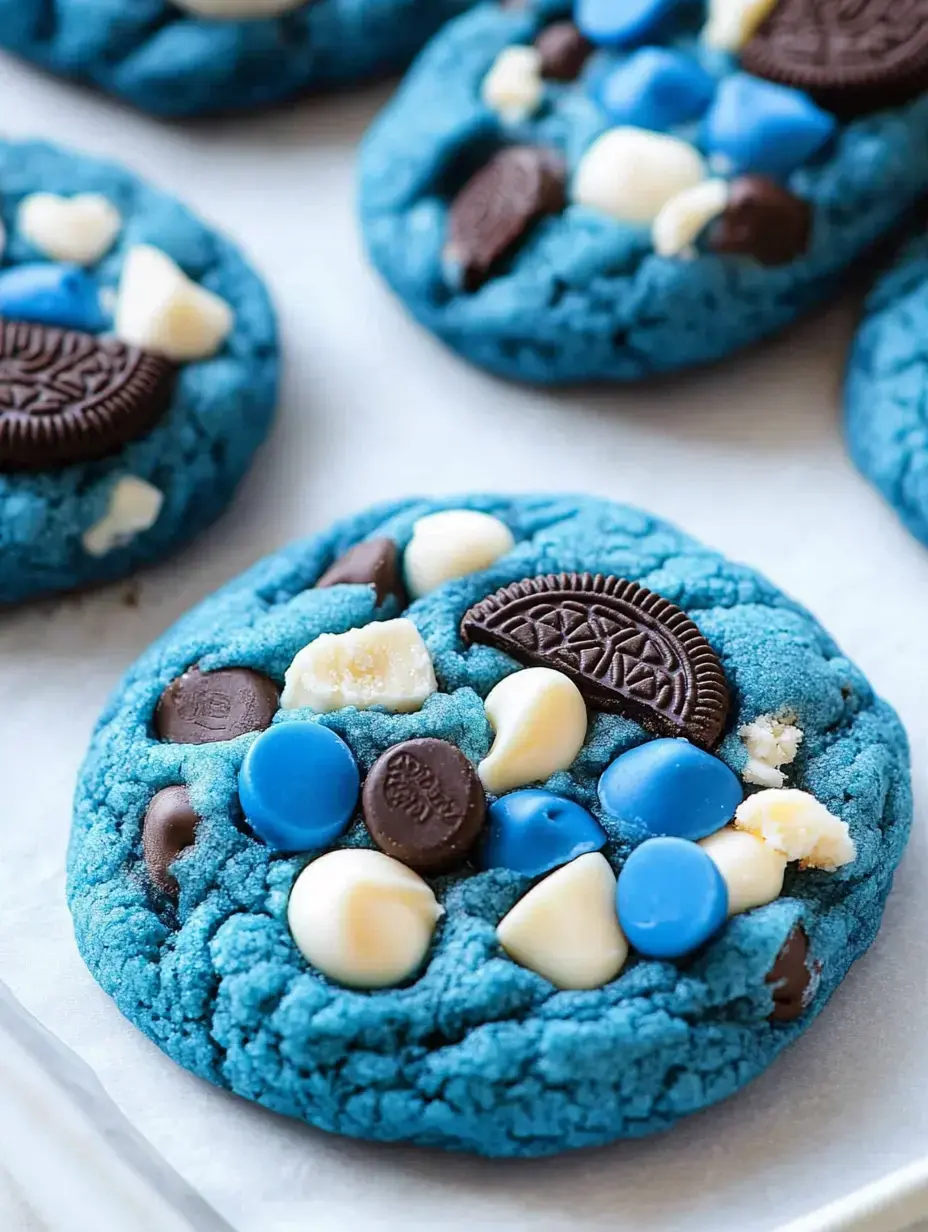
- These adorable Cookie Monster treats will bring a smile to any face! They're chewy blue goodies packed with chunks of white chocolate, broken-up Chips Ahoy and crushed Oreos - that's right, cookies stuffed with other cookies! They're just what you need for children's celebrations or anyone with a soft spot for that lovable blue Sesame Street character.
Achieving That Vibrant Blue
- Nailing that authentic Cookie Monster shade took quite a bit of kitchen testing! What I found works best is a mix of violet, royal blue and electric blue food coloring. Why add purple? It actually helps balance out the yellowish tint from your eggs and butter, creating that bright, cartoon-worthy blue we want.
Gather Your Supplies
- Base Dry Goods: All-purpose flour with cornstarch for extra tenderness.
- Warmed Elements: Let your eggs and butter sit out first!
- Sweeteners: You'll need both white and brown sugar types.
- Coloring Agents: Three different blue/purple shades for the right look.
- Mix-in Goodies: White chocolate pieces, crumbled Oreos, tiny Chips Ahoy.
Baking These Monsters
- Prep Work First
- Set your oven to 350°F and get your cookie sheets covered with parchment or silicone liners. Remember to take out your cold stuff early so it warms up!
- Combine Dry Ingredients
- Toss your flour, cornstarch, baking soda and salt in a bowl and whisk them together. This step means you won't find any flour clumps in your finished treats!
- Work The Butter Mix
- Beat the softened butter with your sugars until it's airy and pale, taking about 2 minutes. Drop in eggs and vanilla, mixing just enough to blend everything together.
- Add The Blues
- Slowly work in your dry mixture, then add your three colorings. Don't stress if it seems too bright at first - it'll look perfect after baking! Keep going until your dough is nicely thick with even color.
- Throw In Chunks
- Now fold in your white chocolate bits, broken Oreos and Chips Ahoy pieces. Keep some aside to stick on the outside - makes them look extra tasty.
- Form Your Cookies
- Roll the blue dough into 2-tablespoon balls. Push extra cookie chunks and chips all around the outside to create that messy Cookie Monster appearance.
- Into The Oven
- Place about 8 balls on each tray with good spacing. Bake for 10-12 minutes, taking them out while still soft - we don't want any browning! Bake one tray at a time for best results.
- Cool Down Stage
- Let them sit right on the hot pan for 15 minutes since they're very fragile at first. Once they've firmed up, move them to a cooling rack.
Nailing The Details
- Get your flour measurement right - lift it with a spoon first, scoop it gently, then level it off. Too much makes dry cookies. Always use parchment or a silicone mat or you'll have a sticky mess. Want them even cuter? Stick some candy eyeballs on top before they go in the oven!
Try These Twists
- Switch up the cookie chunks with whatever you've got - even homemade chocolate chip works wonderfully! Experiment with different chips - try milk, dark or white chocolate combos. Looking for an extra surprise? Tuck a square of chocolate bar into the middle of each ball for a melty center when baked!
 Pin it
Storage Tips
- They'll stay tasty in an airtight container for around 3 days - stick them in your fridge and they'll last even longer. Need to prep early? The dough freezes great for up to 3 months - just let it thaw before adding the outer toppings and popping them in the oven.
Frequently Asked Questions
- → How do they turn blue?
Blend royal blue, electric blue, and violet gel colors for the vibrant tone.
- → Why include cornstarch?
Cornstarch keeps them soft and chewy.
- → Are liquid colors okay?
Gel colors are better for intense shades.
- → Why press toppings on top?
It makes them look and taste better.
- → Can I store dough in the freezer?
Absolutely! Freeze shaped dough balls for up to three months.