
 Pin it
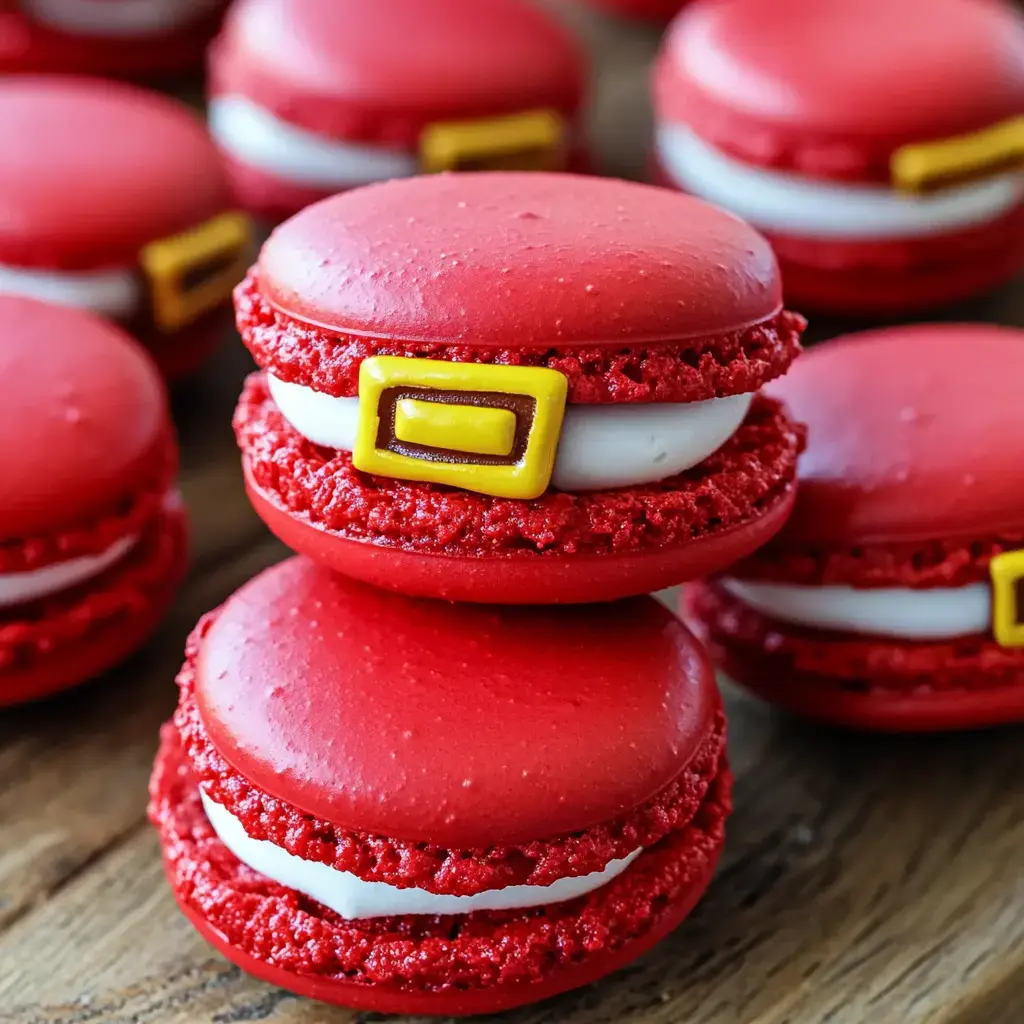
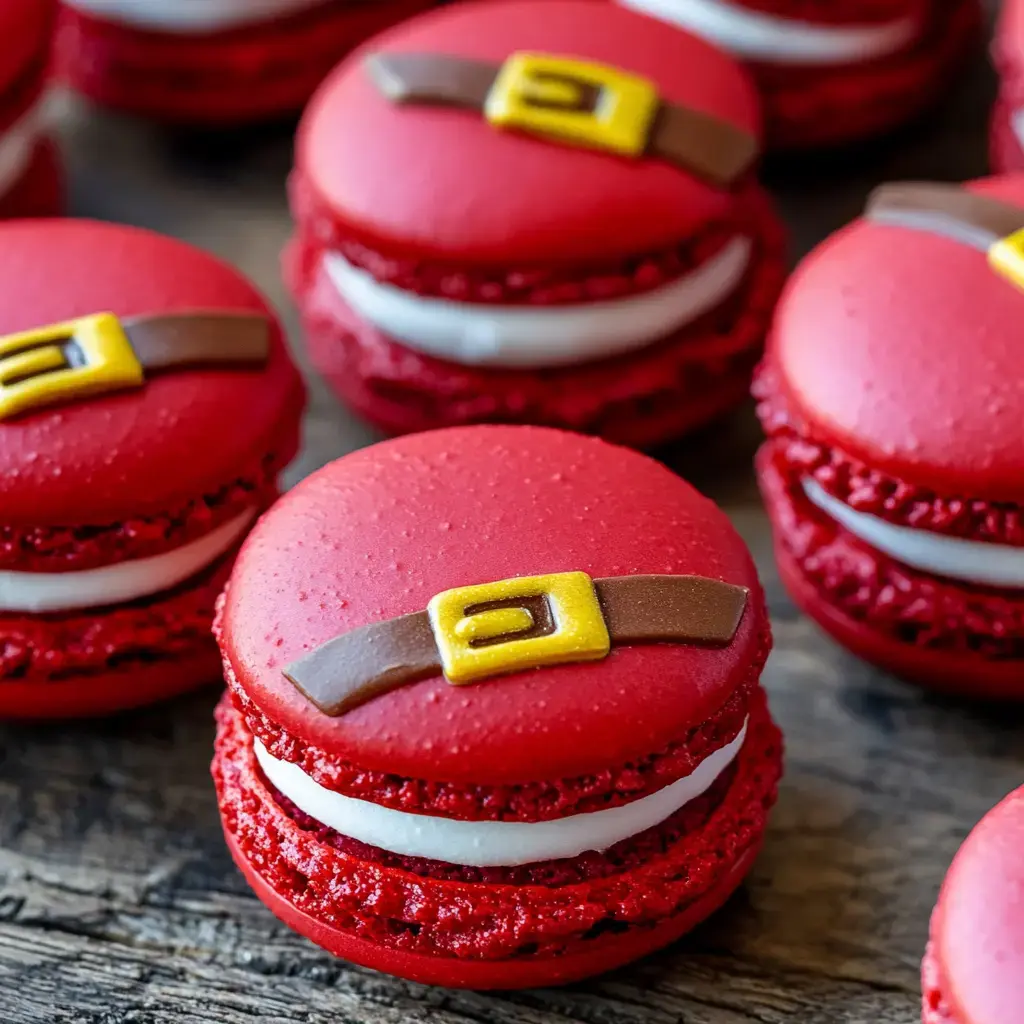
I've perfected these cute Santa belly macarons that wow everyone during the holidays! Through tons of testing, I nailed down how to create these cheerful treats - they've got a delicious sugar cookie buttercream inside, coconut "snow" edges, and a simple royal icing belt that transforms them into Santa's tummy!
What Makes Them Stand Out
Finding the right shade of red wasn't easy but I eventually figured it out! The coconut trim mimics soft snow and the sugar cookie center tastes exactly like the holidays. And don't worry about that royal icing belt - it's surprisingly simple to make, great for a fun activity with the little ones.
Gather Your Supplies
- Almond Flour: Triple-sift the ultra-fine blanched variety, don't skip this step.
- Powdered Sugar: Needed for both cookie shells and filling to create smoothness.
- Egg Whites: Let them sit out first for better volume.
- Granulated Sugar: This gives your egg whites structure.
- Red Gel Color: You'll need roughly a tablespoon for that bright Santa suit color.
- For The Filling: Unsalted butter at room temp, brown sugar, pure vanilla.
- Royal Icing: Mix of meringue powder, confectioners' sugar and water for the belts.
- The Decorations: Food coloring in black and gold shades, plus coconut flakes.
- Extra Tools: Food scale, candy thermometer, non-stick mats, frosting bags.
Time For Some Baking Fun
- Begin With The Foundation
- We'll tackle the macaron mixture first. Triple-sift your almond powder and sugar - seems excessive but makes all the difference! Beat egg whites with a dash of salt until they foam, then gradually add sugar until you've got firm shiny peaks.
- Achieving That Santa Red
- This is when the color goes in. Add around a tablespoon of red gel coloring - sounds excessive but we need true Santa red, not pinkish! Carefully incorporate with dry stuff - remember proper folding technique is crucial, about 40-50 gentle turns until it drips like hot lava.
- Get Those Shells Shaped
- Load your pastry bag - a simple round tip works fine. Squeeze out even circles onto your prepared trays and try keeping them uniform. Bang the trays firmly on your counter several times to release trapped air.
- Drying Period
- Now comes the waiting part - these need longer drying than regular ones because of all that color! It might take up to 2 hours until they're completely dry when touched.
- Into The Oven
- Bake at 300°F for roughly 17 minutes. They're done when they lift cleanly off the paper. Cool them fully on the trays - don't rush!
- Whip Up The Center
- During cooling, prepare your sugar cookie buttercream. Whip softened butter until super light, mix in brown sugar for that cookie dough flavor. Add vanilla and tiny bit of salt to enhance everything.
- Create Santa's Accessory
- Mix your royal icing - combine meringue powder and confectioners' sugar until thick but flowable. Split it up, turn most black for belts, save a bit for gold buckles. Fill tiny decorating bags with the smallest tips available.
- Assembly Stage
- Pair shells by matching sizes. Pipe buttercream around edges then fill centers. Roll sides in coconut while frosting remains soft. Draw black belt and gold buckle on top, then let dry completely.
- Finishing Touches
- Chill everything in the fridge about an hour. Allow them to warm up before serving for creamier filling. Watch everyone smile when they spot these adorable little Santas!
Expert Advice
- Brown sugar gives the filling that authentic cookie dough taste.
- Red shells need extra drying time or they'll split open.
- Practice your royal icing thickness first - it should hold its shape but settle flat.
Troubleshooting Tips
- Color looking dull? You probably need to add more food coloring.
- Shells broken or uneven? They weren't dried enough.
- Belt icing too thick? Add tiny water drops gradually.
- Icing running everywhere? Mix in more sugar to thicken it up!
 Pin it
Customization Ideas
- Switch up fillings with mint or real vanilla bean.
- Create tiny ones for holiday gift packages.
- Leave off the coconut and just do the belt design.
- They stay fresh in the fridge up to seven days so you can make them early!
Frequently Asked Questions
- → Why wait longer for drying?
Red food dye takes a bit more time to set.
- → Should I use egg white powder?
It's helpful if your kitchen feels humid.
- → Can they go in the freezer?
Yes! They’ll keep well for 2 months.
- → Why treat the flour?
It makes it safe for the frosting if eaten raw.
- → How long will they last?
5 days when you refrigerate them.