
 Pin it
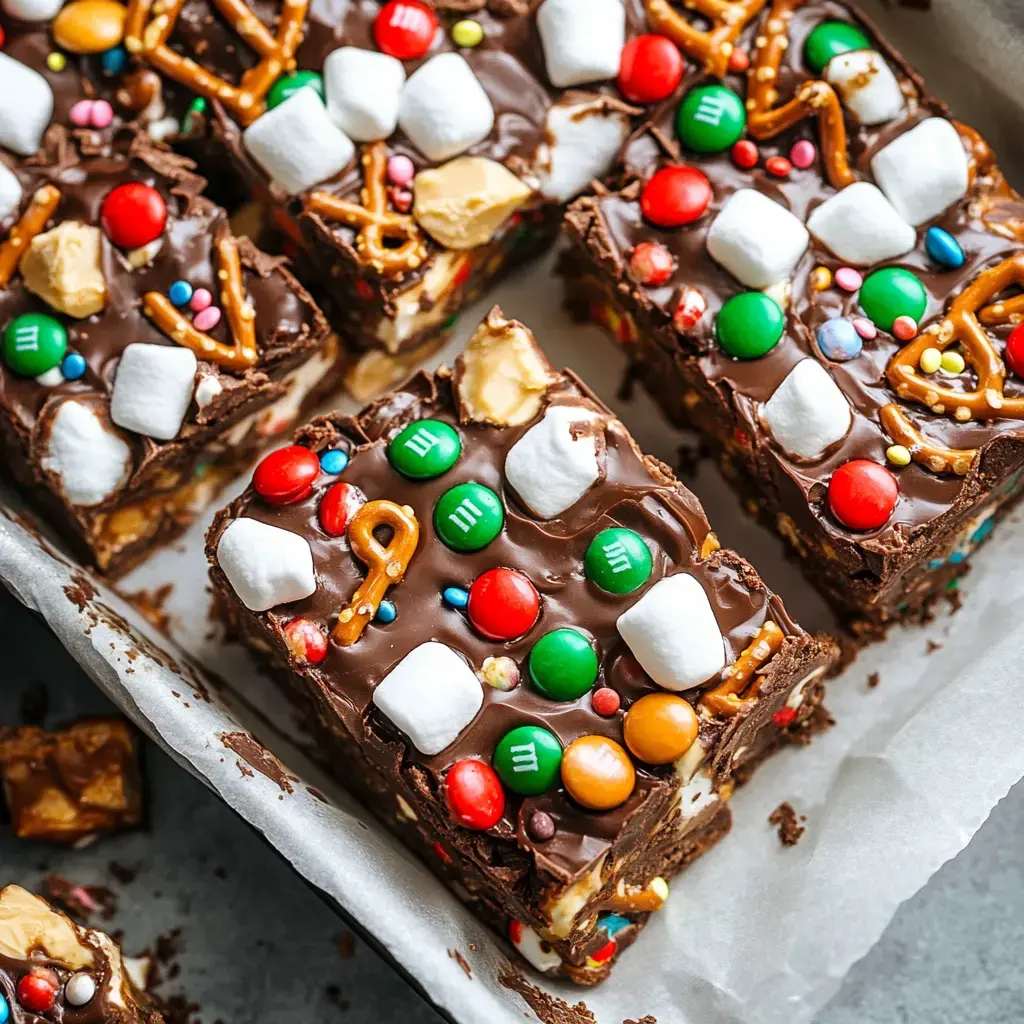
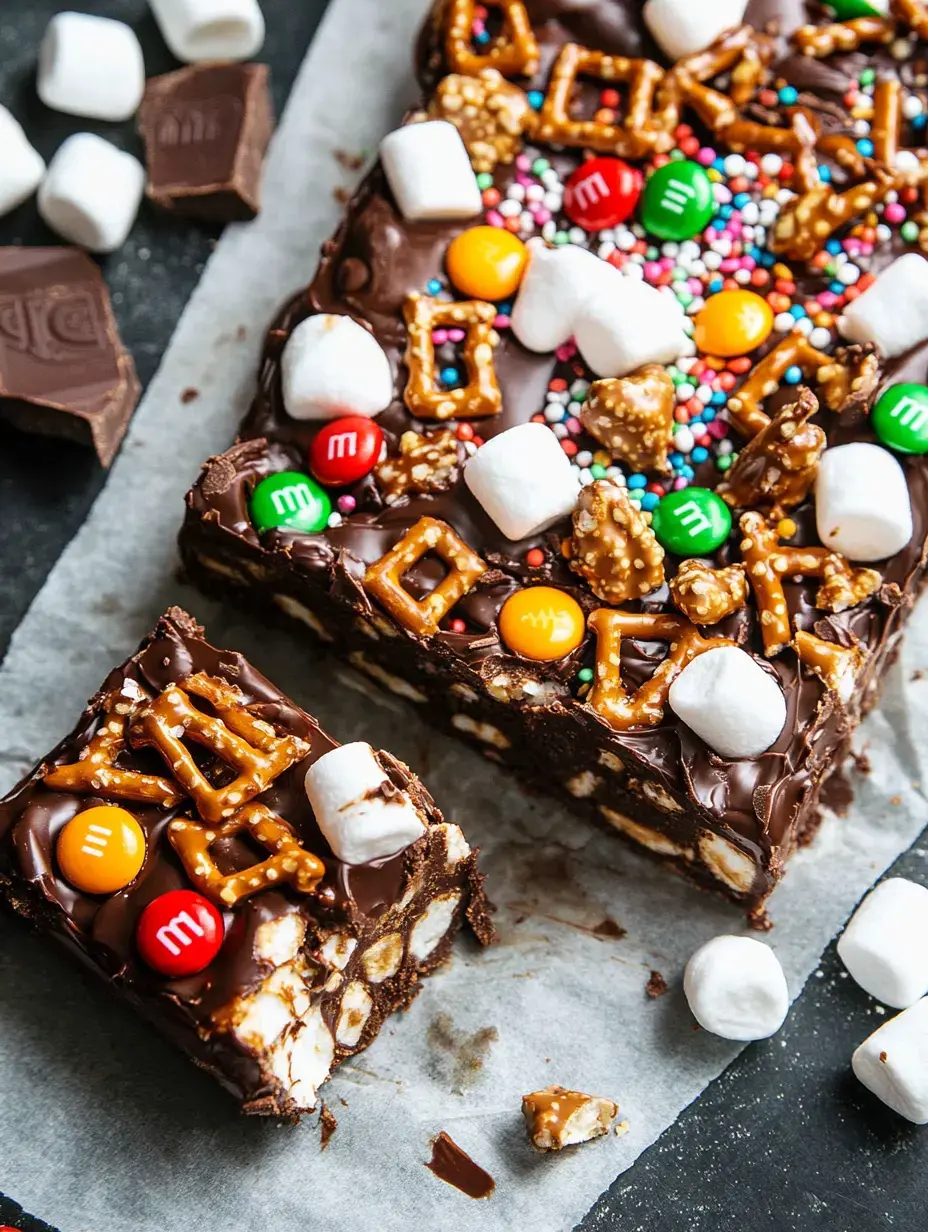
- Check out these knockout rocky road treats that'll flip your snack world upside down! They're packed with all the good stuff - gooey peanut butter, chocolate, fluffy marshmallows, snappy pretzels, colorful M&Ms, and hidden peanut butter cups tucked in the middle. The cool thing? They come together in no time, and you can toss in whatever goodies you fancy!
Time To Begin
- The Fantastic Foundation
- We kick off with this mind-blowing fudgy blend where melted chocolate meets peanut butter and coconut oil for ultimate smoothness.
- Every Tasty Add-In
- This chocolate mixture wraps around puffy marshmallows, crunchy pretzels, bright M&Ms, and whole peanut butter cups too!
- Absolute Wonder
- Each mouthful brings something different — squishy marshmallows, brittle pretzels, candy snap, and that wonderful peanut butter hidden treasure!
Gather Your Supplies
- Semi-sweet Chocolate: 2 cups to melt for your base
- Creamy Peanut Butter: 1 cup gives that soft, fudgy feel
- Pure Coconut Oil: 2 tablespoons makes sure it all firms up
- Mini Marshmallows: 2 cups for that true rocky road vibe
- Salty Pretzels: 1 cup broken into chunks
- Colorful M&Ms: 1 cup for sweet crunch and bright pops
- Peanut Butter Cups: 12 whole cups for the surprise center
- Special Equipment: 9x13 pan parchment paper
Creating The Treat
- Get Your Pan Ready
- Cover a baking pan with parchment paper so you can pull out your treats with no trouble!
- Create Your Base
- Gently melt the chocolate, peanut butter, and coconut oil until it's completely smooth. This is what holds everything together!
- Combine Everything
- Don't waste time! Stir in the marshmallows, pretzels, M&Ms — coat all the goodies in chocolate.
- Build Your Layers
- Spread half the mixture in your pan, arrange peanut butter cups on top, then cover with what's left.
- Cool It Down
- Stick it in the fridge and let it harden up — tastes even more amazing when chilled!
Nailing The Recipe
- Ingredients Count
- Better chocolate, better peanut butter makes the whole thing taste fantastic.
- Keep Moving
- After melting the chocolate, don't slow down — it starts to harden pretty fast!
- Mix Thoroughly
- Stir everything well — you want all the good bits spread through every bite.
What Makes These Special
- Crowd Pleaser
- Simple to whip up, feeds lots of people, and looks totally amazing!
- Fun For Children
- Get the kids to add the mix-ins — they'll love being your kitchen helpers.
- Never The Same Twice
- Switch up what you mix in based on your pantry — makes each batch uniquely yours!
 Pin it
How To Keep Them Fresh
- On The Counter
- Store your tasty squares in a sealed container — they'll stay good at room temperature for about 5 days if they don't vanish first! Put wax paper between layers so they won't stick.
- In The Fridge
- Want an extra fudgy treat? Keep them in the fridge for up to two weeks. The chocolate gets firmer — actually improves the taste! Just let them sit out a bit before you dig in.
- In The Freezer
- Made too many? They freeze wonderfully! Wrap them first in plastic then aluminum foil — keeps them tasty for three months. Let them thaw overnight in your fridge when you're craving one.
- Taking Them Places
- Bringing them to a gathering? Keep them cool, especially when it's hot — the chocolate might get runny. Pack them with ice packs — works like a charm!
- Smart Cutting
- Slice them while cold — gives you neater pieces. Have napkins ready — they're worth messy fingers! About two-inch squares work great — perfect for sharing.
Frequently Asked Questions
- → What’s the purpose of double boiling?
It stops the chocolate from burning or clumping.
- → Can milk chocolate work here?
Absolutely, but it’ll turn out sweeter than dark.
- → Why do we tap the pan on the counter?
It makes everything settle better and removes air gaps.
- → Is swapping peanut butter cups okay?
Sure, use any type. Trees just add a holiday vibe.
- → What’s the best way to store these bars?
They’re good in the fridge for up to two weeks.
- → Can I make these using gluten-free stuff?
Yep! Gluten-free pretzels and candies will do the trick.
- → Why let the chocolate cool first?
So the marshmallows don’t melt into a mess.